As a crafter and hobbiest, I have found the most pleasure in a simple smile, or a great big hug; something unexpected and special.
At Christmas time there were several friends and family who decided that every day leading up to Christmas, during the month of December, would be dedicated to serving random acts of kindness.
One friend saw a homeless man and asked her little boy, "what can we do for him?"
He answered, "Mom, lets go get him a Happy Meal."
And so they did. The man was so surprised. He said he hadn't eaten all day, and hugged the little boy tight.
Another family picked up a pizza. They traveled to the poorest side of town and randomly picked out a house. Together they all knocked on the door and handed the pizza to a very thankful family.
I don't know if it was a trend for this year, but it seemed to stretch beyond the boundries of my small world. As we traveled to Wisconsin for Christmas, we pulled up to pay our toll, only to be told that it had been paid by the car before us. The toll operator had been accepting tolls for the cars to come all day long. I never saw such a happy smile on a young man's face. For once he was seeing a thankful, respectful, caring world of givers and he couldn't contain his happiness. His thankless job had been blessed that day and the blessings just kept coming.
I wondered how I could use my craft projects to bless someone. The coat drive was in full swing and as I pondered how I might help, and then it came to me. I could make mittens. I scoured the thrift stores picking up as many wool sweaters as I could find and began making recycled sweater mittens. I had decided long ago that every person wanting one pair of mittens would receive two; one for their order, and one to give to someone of their choosing, or to someone in need. It felt so good knowing that these wonderful mittens would warm the hands of a child who might otherwise stuff cold hands into pockets that never seemed to suffice. To this day I have kept this act of kindness going.
Thinking about Mexico has weighed heavy on my heart for a while. Our family owns a winter park model home in Texas, quite near the border. Every year we cross to buy vanilla and trinkets in the markets. Every year I see them. They are huddled and cold, and have little babies wrapped in thin blankets held close to their hearts. They don't say much, but their little cans sit inches away and tell their stories. The few coins tossed into the cans might get them through the day and put a little food in the belly, but the hands, the hands reveal their truths. They are worn and wrinkled, and gently caress the tiny bundles they hold. They look at me in hallowed eyes void of any sparkle. They cry out in silent pleas. Although this is Mexico, there is a chill in the air, and their hands burn with cold, hard poverty. But what can I really do? I fear my dollar will line the pockets of greed, not need, but I give. I only hope the women and babies might receive the food that will warm their bellies this day, yet I fear the worst. So what can I do? I will take my mittens. They are warm, and if I make a scarf as well, it might wrap the children from the chill of cruelty. I am taking several pair with me this week. I know that they will do more good for these moms than I could ever imagine.
This is my random act of kindness for this winter season. And when I come back home to Michigan, I will take some to the local battered woman's shelter, and to the schools, and continue to give a second pair when someone orders one.
As Spring rolls around I want to continue my random acts of kindness. I'll start by making dog tags using my stamped washers. I'll stamp them with our city and state. I can leave them at the shelter for people to take from a basket on the counter. Perhaps the shelter can put a little donation can up and use any money to care for the lost and abandoned pets.
Last summer I put all of my extra garden produce on a roadside stand and simply put out a donation can. My sign said please take as much produce as you need. All donations will go to the local pet rescues. I received more money through donations than I ever did selling outright, and no produce went to waste. It was a wonderful feeling and I knew the money earned would help the 70+ dogs that were rescued from a local puppy mill. It was such a great feeling.
Please help me think of some craft projects that will help me continue the tradition I have started. If you have some ideas of ways to transform new or existing crafts in to random acts of kindness, please leave me a comment.
365 days of crafting. Join me as I explore a new craft each day.
Saturday, February 16, 2013
Thursday, February 14, 2013
A Time to Reflect and Organize
Today my hurry-up world slowed down.

I finished four little bookmarks for my grandkids, and printed a Bible message on burlap for Valentine's Day. Then I looked around and realized that my little world of crafts had become a big mess. It is time to give the crafts a rest until I get organized. So in keeping with crafting every day, I'm putting up several ideas that I have not yet crafted, but seem so simple I have them on my list of "I'll do that next". I think the pictures give enough information that we can do them from sight.

Adorable. Can't wait to visit my Grandkids and bring along some floor tiles. I think tiles would look great with these little footprints. I'll bet the small tiles would be the right size for newborns as well.


And now that the metal stamping bug has me pounding away, I think those cute little empty pickle jars I've been saving now have a place. If I take one of our old barn-wood planks and mount it on the wall, I'll have a nice country shelf that will hold several jars and stampings.

My craft area is getting clean, and I have a plan now for three or four new projects. Not a bad day if you ask me! Craft much, have fun.
Thursday, February 7, 2013
Out of My Gourds

I fell in love with the gourd by accident. I wanted some seeds for my garden, you know, those little ones that filled baskets & doorsteps around Halloween. While looking for the seeds, the search brought me to a world of amazing art. I found the Welborn Gourd farm in Fallbrook, California. Their website showcased gourd art truly worthy of gallery display. It just so happened that I was going to be visiting my sister in southern California that year. Low and behold, Welborns were conducting their annual gourd art festival during the time I was to be out there, and come to find out, it was only 15 minutes away from my sister's house. Well, as you can imagine, my craft mind was on steroids when I walked through that festival where I fell in love with the gourd.
Just a few pieces of the art coming from their website. I could only dream to have this kind of talent.


The one on the left is by Carrie Dearing
and
the one on the right is by Pamala Redhawlk
Welborn Gourd Gallery
Well as you can see, the art is fabulous. I really had no expectations of ever doing anything as beautiful as these, but I dabbled. Soon I had purchased a dremel and set out to craft a gourd. I don't even remember what my first project was, but I started small. Although this was not my first project, it is typical of the type of project that got me started.


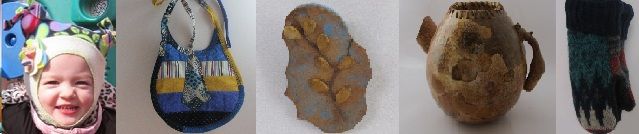
I wanted to make some more unique designs that kind of fit with my outdoor, natural & primitive nature. I came up with gourd jugs and animal themes. Here are three of my finished projects.


Our school mascot is a tiger, so I made a little box for my school desk to hold paper clips. The basket of the box was woven with clothes line and jute. There is a round gourd shard base. The top section of the box was also woven in the basket weave, and then mounted with the painted tiger gourd shard top. I am not a painter, so I went to clip art and found an easy design to trace. Then it was just a matter of getting the painting right. I looked at a clip art photo and basically just followed the colors in that to try to get it right. For me, I did not worry about how professional it should look. I just wanted to dress up my desk by featuring our mascot.

As I became more confident in my abilities to design, I created this turtle. I had seen one similar to this at the festival so many years before and had a little snippet of a picture that I took while enjoying the Welborn art festival. I thought, "I can do that". So with a little piecing, this turtle was born. There were several gourds used to create him. Tennessee spinner gourds became the head and front feet, and tail. The back feet were designed with some scrap shards I had in my "keep it for a rainy day" bowl. -Yes I collect seeds and pieces of scrap gourd just like I would fabric scraps for quilts.
Dressing up the turtle was fun. A bit of paint, some faux suede fabric scraps, a basket weave circle of color around the top shell, and a few feathers for the head, and he was complete. I love him! (and so does my daughter, who has claimed him for her own once she returns from her mission trip to Haiti.) In the meantime, he sits atop my piano waiting for his permanent home.
I moved on to wood burning and lamp making. My first lamp had a little bit of wood burned embellishment and I think it turned out quite cute.


Finding gifts for the grandkids is always forefront in my mind. Lately, with all the work on the blog, I have dabbled in the gourds in smaller projects. The rattles and pins below are quick and easy. If you have never worked with gourds before, I would suggest starting with a project like this.

Again, I wish the picture was clearer, but I'll post another when I make my next one. This is a simple project. It is just two spinner gourds put together and lashed with pine needles. The seeds are still in the gourds and create a really nice little rattle. I have made a few of these as keepsakes for the babies in our family. I do have to caution, this is the perfect size for little hands, but I would never recommend giving it to a baby to use. A gourd is a bitter, fruit that could be harmful if swallowed. Also, it wouldn't take much for a baby to pull the glued pieces apart and get the seeds into his/her mouth. Instead, this is meant to go in a little case and shelved as a memory.
My latest projects have been in designing embellishments for hats, and hair, and even as buttons and pins.

Are you looking for a place to display some of your items. Whether for sale, or just a link to your site, you may want to be featured in our craft show. Check it out. Join the craft show!
Tuesday, February 5, 2013
Be My Valentine
 Today, rather than put together a tutorial, I have collected several ideas for a Heart-felt Valentine's Day. Most of these ideas are not my own. When I surf, I collect the ideas I love. Sooner or later I will get to making many of these and put my own twist on them. I think most of these crafts explain themselves and I would just like to share. I wish now I had copied the links to give proper credit, but instead I will simply say thank you to those who came up with each project.
Make caramel apples, then sprinkle them in candy hearts.

I am going to make a similar
pendant from my gourds and
set it in nail heads that I
normally use in leatherwork.

I love the shape of this
wooden heart. It is
perfect for
crafting from gourds.


Bright and beautiful, aged and collectable. These mini quilts are perfect for gift giving.
 Isn't this pillow adorable?
If you are a quilter,
you probably have the
pattern in your applique blocks.


How simple an idea. Take a few paint color strips, punch in a few hearts, and a bookmark is born. Brew up some tea with your own heart-shaped tea bag. Then cuddle up with a good book.
How cute is this? What child wouldn't like a heart shaped hot dog?

Bits & Pieces
Scrapbooking, memories, crafting your world; we fashion our lives in the things we create. Every little paper scrap, every piece of fabric, every photo; has a page in your heart. Designing a scrapbook page puts your heart onto paper.
When you can't think of what to say, when your ideas have run thin and you need a little help putting together your pages, "Scrapbook Titles and Quotes" provides you with a resource to help you design.

Click Here!
When you can't think of what to say, when your ideas have run thin and you need a little help putting together your pages, "Scrapbook Titles and Quotes" provides you with a resource to help you design.

Click Here!
Sunday, February 3, 2013
Magnet Message Board
Magnet Message Board
 Recycling is so fun! I pick up a bottle cap, head to the trash, and Wait! Whoa! I can use this.
I wash up a cookie sheet, no longer fit for the eyes of company, but magnets sure stick to it. I can use this.
The orange juice can once housed delicious juice, but now? I know it can be used for something. I can use this.
One small snippet of fabric used to fashion my Granddaughter's quilt. It's too cute to throw away, too square for a strip quilt, too little to create a patterned new one, but, I can use that.
This craft idea came from a great local crafting duo who spend many Sundays sharing great ideas. Craft redo
When I couldn't attend, Sally, my constant craft companion and friend went and shared this with me.
I loved it!


Here is mine. Although I have not finished, you get the idea.
We set out to get organized, and organized we became. All of these organizers have the same foundation, but each is unique in its own purpose. The first is a message board. Sally's shows off cute little pictures on her magnets, and mine is a way to keep my computer cords & things in order. You can be as creative as you wish in making yours.
Here is what you will need:
Cookie sheet with holes punched for hanging cord or ribbon
Fabric scraps
Ribbon
bottle caps
pill bottles
other containers
magnets
glue
Step one: Drill two holes in the top of the cookie sheet for hanging. You could also take a good size nail and hammer the holes through the metal that way.
Step two: pick out two or three fabrics that coordinate.
Step three: Cut them to fit the cookie sheet.
Step four: Glue them down. (I used a spray adhesive and it worked well.)
Step five: Find a ribbon (fabric also works) to cover the divide between fabrics and sides if you wish.
Step six: Attach magnets to whatever containers, bottles, embellishments you like.
Step seven: Hang your organizer and begin enjoying.
Friday, February 1, 2013
Metal Stamped Jewelry
Today I found a craft I absolutely love. It is the stamping of letters into metal objects. When my daughter was married, her theme was live, laugh, love. Oh how I wish I had this craft knowledge at that time. She had asked me to make all of the jewelry for her bridesmaids and herself out of my gourds (tutorial to come). Making the tiny flowers from gourd shards and seeds was easy, but painting on the live, laugh, love gave me fits. I have never had good penmanship. No matter how hard I tried, the words always looked flawed to me. The jewelry turned out adorable, despite my penmanship shortcomings. I had visions of making table embellishments with the words as well, but couldn't make them meet my need for perfect lettering, so I didn't even approach my daughter with the idea. Now, I have found the metal stamping kit, and I know I could have used it to create the table centerpieces that would have carried her theme into the reception.
 I found the cutest candle that would have been perfect with her theme. This one came from Pinterest, and I no longer have the name of the person who posted, but I want to give them credit. This idea is just the kind of project that I can do. I use metal washers as backs for many of my gourd necklaces so I have plenty on hand. Aren't they adorable? Adding jute to hold them to the candles makes them so "country". But what I really like is the ability to stamp words onto the washers. This one has the live, laugh, love theme. I can see doing this in eat, pray, love, or putting faith based words like "the fruit of the Spirit. If I did this one I would make a centerpiece of three of these candles and stamp one word on each washer.
 Taking this simple design, I added names to my Valentine's Day gifts for my granddaughters. The stamped washer was easily attached to the end of the paper beaded necklace (tutorial in the archives on the right side of the blog) I made for one of the girls. It was so cute.
 Then I worked on one of the candles for myself. Again, it turned out so well.
To make these stamped washers you will need a metal stamping set. I searched the hardware stores in my area and found none available, so I went to my faithful Amazon. I learned early on that I could actually get things I needed here and spend quite a bit less than shopping in my local area. Because I live in a rural area, it takes about 20 minutes to drive anywhere to find my materials. For me the cost of gas is far more than any shipping I might have to pay, and the products are at my door in as little as two days. I have listed two products (links on the top right) that would be perfect if you are interested in trying this craft. One is the metal alphabet punch stamp set, and the other is a nice idea book. Check them out. As I make more items I will post the pictures.
Making your stamped washer
supplies:
various sizes of washers
sand paper (optional)
anvil or metal/concrete base
hammer
metal alphabet stamp set
permanent markers
jute or other stringing material
Step 1. Laying your washer on top of your anvil, position your first letter,
Step 2. Strike the letter with your hammer. (I do this about 10-15 times while holding the punch steady.)
Step 3. Position your next letter and repeat this process until all letters have been imprinted.
Step 4. (Optional) use the sand paper to created a distressed pattern on the washer.
Step 5. If you want color, trace the imprinted letters with the marker.
Step 6. Attach your cord in whatever fashion you choose.
That's it! It's quick and easy. Enjoy!
Share your stories. Email your fond memory or story to admin@explorecreatecraft Please put "story" in the subject line. If you have a particular page you would like your story posted, please put that in your message along with the story.
And when you just don't have the words to express in times of sorrow, turn to this book for just the right words to say. Click Here!
One of my favorite memories has been running a roadside stand. It was here that I met a beautiful lady who will always have a place in my heart.
My love of God has brought me through an abundance of pain and conflict. He has brought me to His truth in a ministry of love. We strive to live what God has set before us and in that life, provided
ministers who teach accurate information, and access to resources like online classes and Sunday teachings at Living Hope International Ministries . In God I found my way when the world said I couldn't, and brought people into my life that always brought me back to God's wonderful Word. The story below reflects just one small part of a life centered in God's Love. Enjoy.
Customers came in hurried minds, quick to grab a handful of nature after busy days confined to cubicles and windowless rooms. They loved the fresh produce and adored the gourds crafted by tender fingers.
She came alone, this angel sent from God. She asked for beans and peppers, green from sun kissed days. And she eyed the birdhouse gourd painted by tender toddler hands. She kneeled before the child whose hands finger painted her heart upon the gourd. "Did you help your Mommy plant this gourd? It is a beauty fit for a royal bird."
My daughter nodded in silent pride as this angel paid for the little birdhouse gourd. "But this is too much," I protested.
She winked and placed an extra quarter into the palm of the child when she thought I wasn't looking. As she left she spoke to the child. "You help your Mommy now, you help her paint the gourds."
I looked at my child as she beamed in delight.


To make these stamped washers you will need a metal stamping set. I searched the hardware stores in my area and found none available, so I went to my faithful Amazon. I learned early on that I could actually get things I needed here and spend quite a bit less than shopping in my local area. Because I live in a rural area, it takes about 20 minutes to drive anywhere to find my materials. For me the cost of gas is far more than any shipping I might have to pay, and the products are at my door in as little as two days. I have listed two products (links on the top right) that would be perfect if you are interested in trying this craft. One is the metal alphabet punch stamp set, and the other is a nice idea book. Check them out. As I make more items I will post the pictures.
Making your stamped washer
supplies:
various sizes of washers
sand paper (optional)
anvil or metal/concrete base
hammer
metal alphabet stamp set
permanent markers
jute or other stringing material
Step 1. Laying your washer on top of your anvil, position your first letter,
Step 2. Strike the letter with your hammer. (I do this about 10-15 times while holding the punch steady.)
Step 3. Position your next letter and repeat this process until all letters have been imprinted.
Step 4. (Optional) use the sand paper to created a distressed pattern on the washer.
Step 5. If you want color, trace the imprinted letters with the marker.
Step 6. Attach your cord in whatever fashion you choose.
That's it! It's quick and easy. Enjoy!
Share your stories. Email your fond memory or story to admin@explorecreatecraft Please put "story" in the subject line. If you have a particular page you would like your story posted, please put that in your message along with the story.
And when you just don't have the words to express in times of sorrow, turn to this book for just the right words to say.

One of my favorite memories has been running a roadside stand. It was here that I met a beautiful lady who will always have a place in my heart.
My love of God has brought me through an abundance of pain and conflict. He has brought me to His truth in a ministry of love. We strive to live what God has set before us and in that life, provided
ministers who teach accurate information, and access to resources like online classes and Sunday teachings at Living Hope International Ministries . In God I found my way when the world said I couldn't, and brought people into my life that always brought me back to God's wonderful Word. The story below reflects just one small part of a life centered in God's Love. Enjoy.
An acre of
Love and Laughter
It wasn't
easy making ends meet in the 90's. I had
quit my job teaching in order to raise our children and the farm. Everything was falling into place. I could grow my gourds for crafting, farm the
land side by side with my better half, and be the best stay at home Mom in the
world.
We'd rise
early to ready the tractor for the day ahead.
Engines were running long before my senses. I emerged groggy eyed and exhausted from
sleepless nights, as one by one each of the five children would wake crying out
from troubled dreams, or restless tummies. A soft rub on the cheek, a soothing
melody sung in quiet whispers, would drift them back to sleep. I'd spend the remainder of my night in broken
dreams intertwined with gourds and fallowed fields needing as much attention as
the children.
The garden
blossomed with the fields. The corn grew
strong and tall as did the gourds.
But a silent mind conjures false realities.
A bumper crop was growing. We might be able to pay off the farm.
The gourds grew large, still green, but promising. A good kettle gourd could shape itself into a beautiful lamp, or a basket deeply woven into shapes and forms that translated our life. Either would bring a great price at local craft shows.
But our mind's reality falsely paid the price of extravagant dreams.
An early September frost invaded the fields cutting short the corn, killing the gourd long before its time.
Without the
crop, our pockets stretched until frayed patches of fabric dressed the children,
and milk became a luxury. Dipping into
our reserves, we survived on an acre of love and laughter.
Winter came and went ushering in a Spring of new hope. Day by day I watched the children decorate the garden with laughter. A wiggly red worm brought giggles and grins. The tomato hornworm amazed their senses. The joy of this simple life defined our family. We thanked our God as plants grew strong and new hope grew with them.
The beans and potatoes fed our appetites; the gourds, our spirits. We crafted birdhouses and set them out to dry by our roadside vegetable stand.
Customers came in hurried minds, quick to grab a handful of nature after busy days confined to cubicles and windowless rooms. They loved the fresh produce and adored the gourds crafted by tender fingers.
She came alone, this angel sent from God. She asked for beans and peppers, green from sun kissed days. And she eyed the birdhouse gourd painted by tender toddler hands. She kneeled before the child whose hands finger painted her heart upon the gourd. "Did you help your Mommy plant this gourd? It is a beauty fit for a royal bird."
My daughter nodded in silent pride as this angel paid for the little birdhouse gourd. "But this is too much," I protested.
She winked and placed an extra quarter into the palm of the child when she thought I wasn't looking. As she left she spoke to the child. "You help your Mommy now, you help her paint the gourds."
I looked at my child as she beamed in delight.
A crafter had been born that day.
Subscribe to:
Posts (Atom)